Dealing with basement flooding or unwanted moisture? Installing a 3/10 HP pre-plumbed sump pump system is one of the best ways to protect your home from water damage. If you’re worried the installation will be complicated—don’t be. With this guide, you’ll learn how to install one step-by-step even if you’re not a technical expert.
Let’s break it down in a simple, friendly way so you can get the job done efficiently, safely, and without stress.
Introduction to Pre-Plumbed Sump Pump Systems
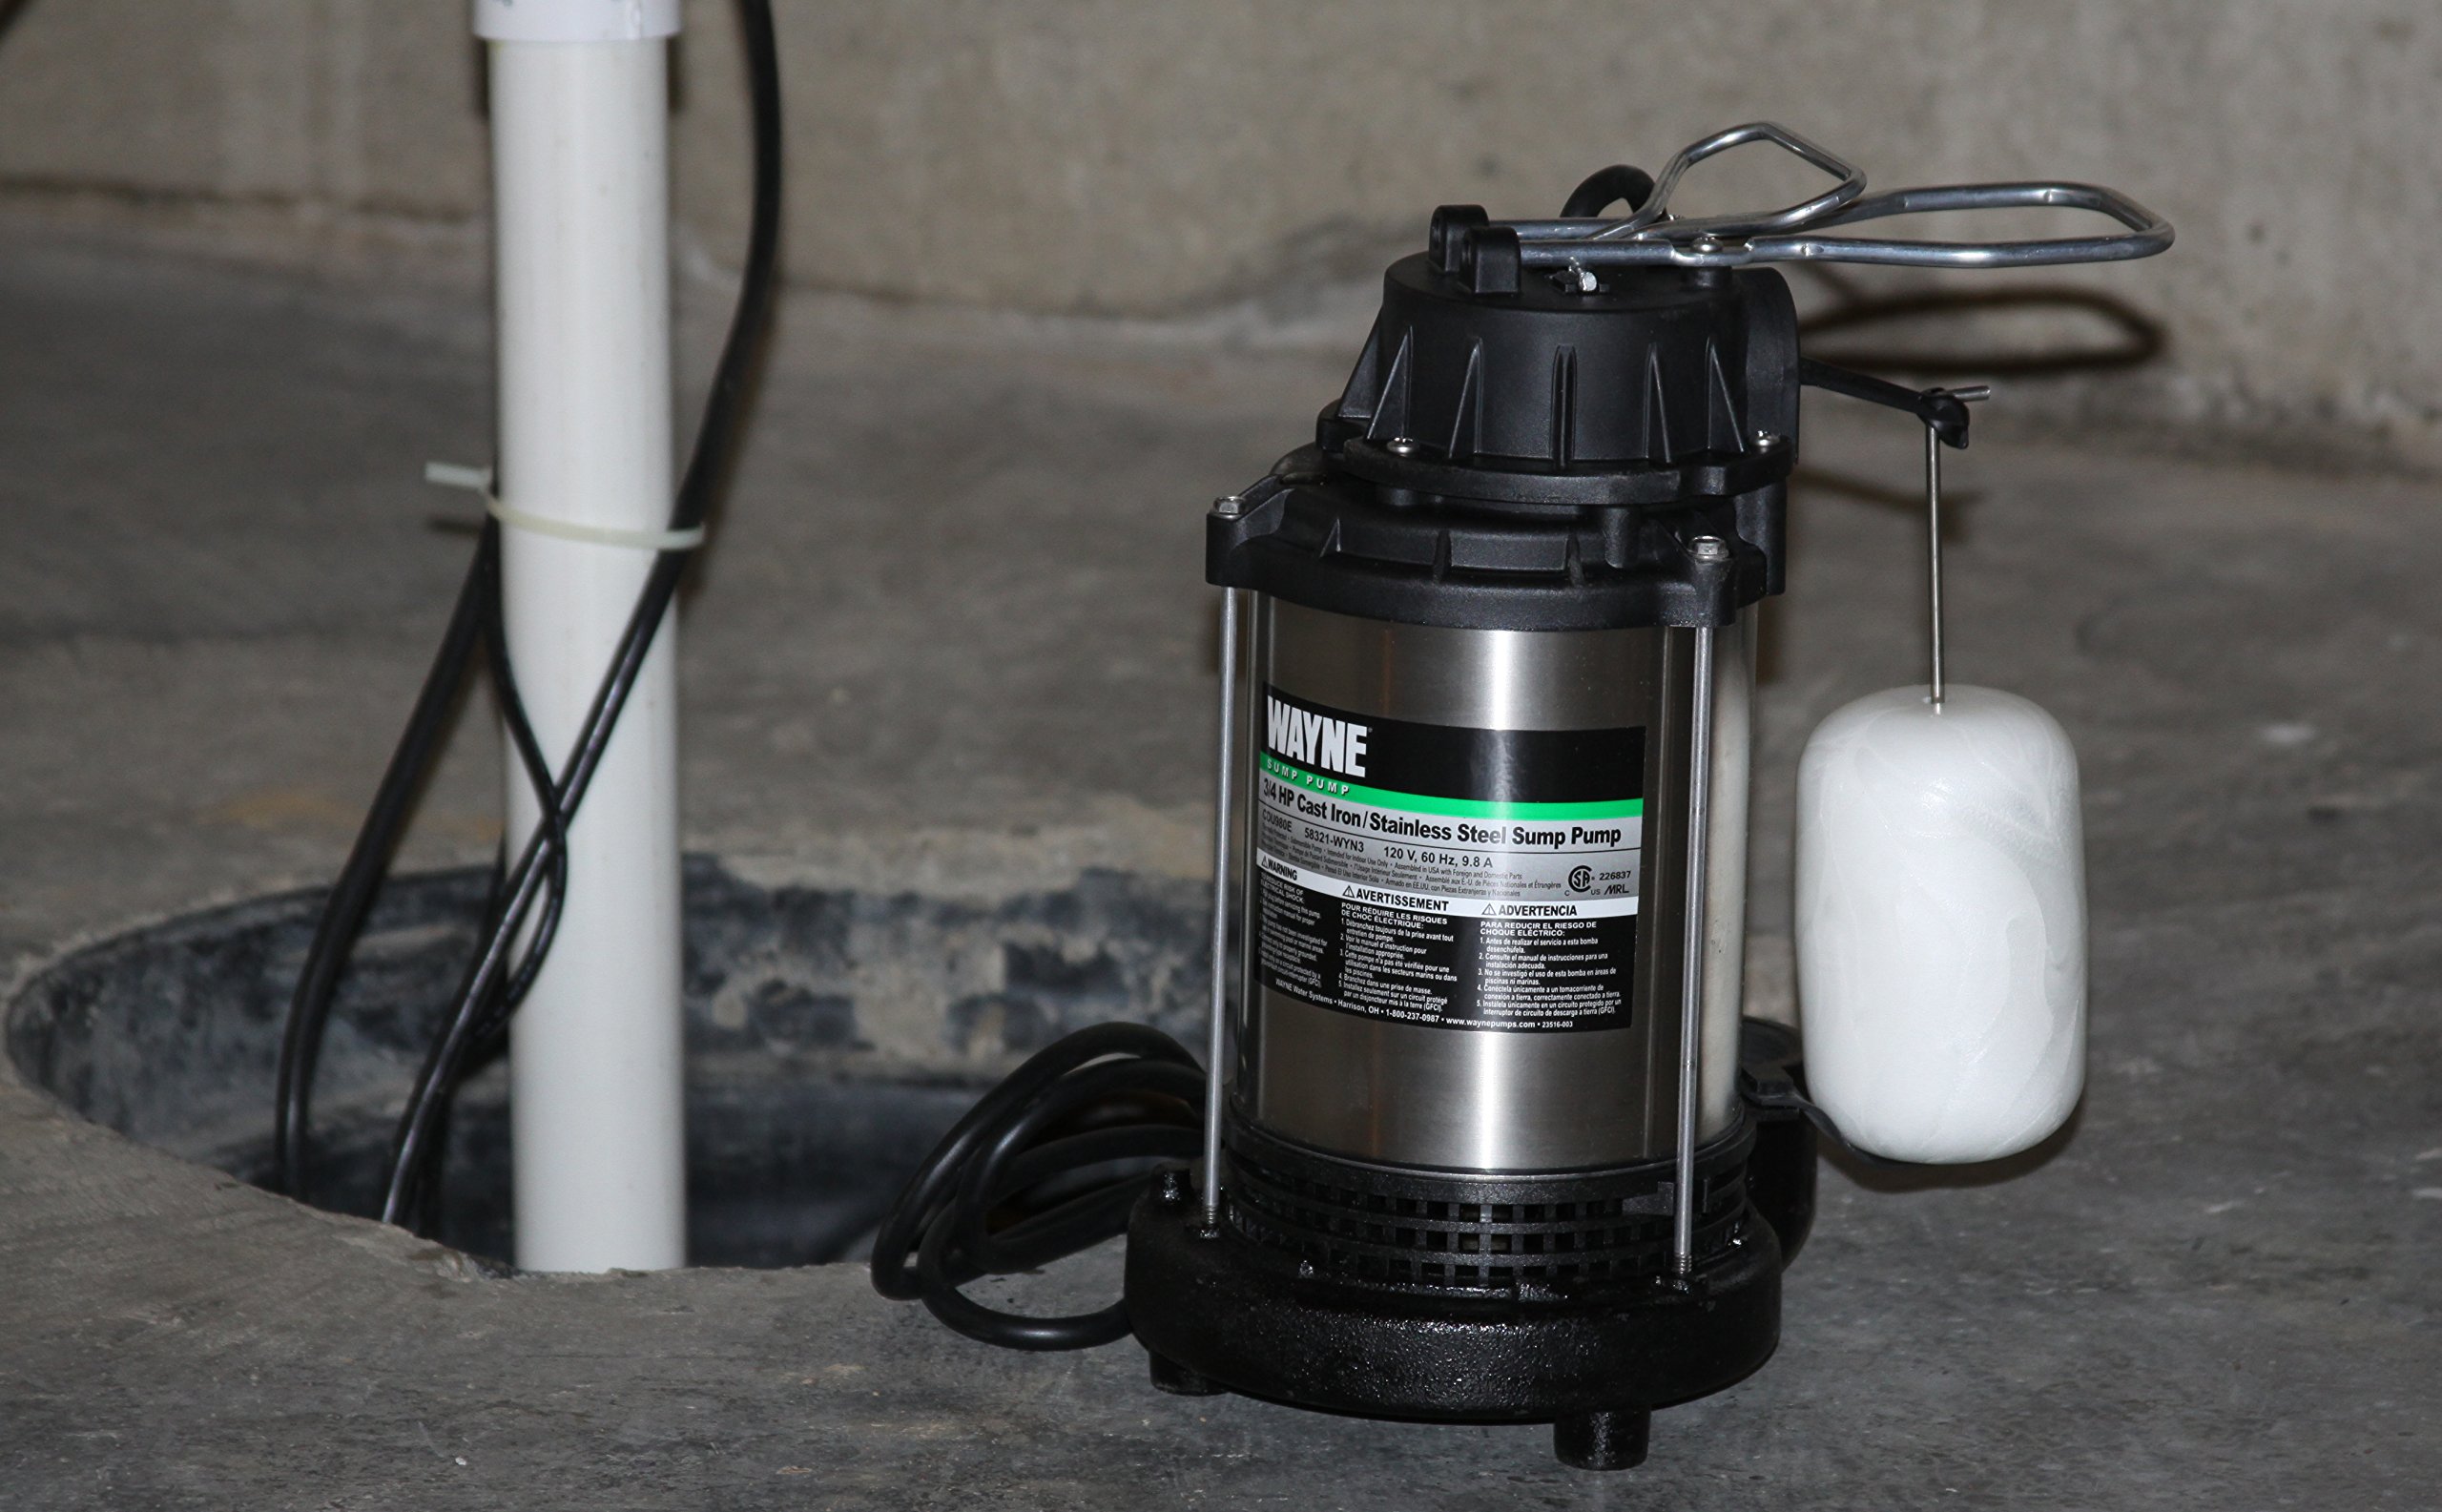
What is a 3/10 HP Pre-Plumbed Sump Pump?
A 3/10 HP sump pump is a compact yet powerful pumping system designed to remove water from basements, crawl spaces, or low-lying areas at home. Since it’s pre-plumbed, the plumbing components are already assembled, making installation much easier and faster.
Why Choose a Pre-Plumbed System?
Imagine assembling furniture with all parts already connected. That’s what a pre-plumbed pump feels like. You don’t spend hours figuring out which pipe goes where—it comes ready to place, plug, and pump!
Where Is It Used?
These systems are perfect for:
- Residential basements
- Crawl spaces
- Small commercial spaces
- Areas prone to flooding or seasonal water buildup
Benefits of Installing a Pre-Plumbed 3/10 HP Sump Pump
Faster Installation
Because everything is pre-assembled, you skip 60% of the installation work.
Reduced Risk of Errors
Fewer connections mean fewer chances of leaks or wrong fittings.
Efficient Water Removal
A 3/10 HP pump is strong enough to remove water quickly, keeping your home dry and safe.
Tools and Materials Needed
Essential Tools
| Tools Required | Purpose |
|---|---|
| Shovel | Digging the pit |
| Level & Tape Measure | Ensuring accurate placement |
| Utility Knife | Cutting vapor barrier or liner |
| Drill with Hole Saw | Making discharge exit hole |
Additional Helpful Supplies
- Gravel or stone
- PVC pipe & fittings
- Teflon tape
- Waterproof sealant
Preparing for Installation
Inspecting Your Basement or Crawl Space
Check the lowest point where water usually collects—this is the ideal placement for your sump pump.
Choosing the Right Location
Pick a location:
- Near a wall for discharge access
- Close to a power outlet (GFCI recommended)
- Away from finished flooring
Safety Precautions Before Beginning
- Turn off nearby electrical sources
- Wear gloves & protective eyewear
- Keep children and pets away
Step-by-Step Installation Guide
Step 1 – Unpack and Inspect the System
Before you start digging, inspect your pump, basin, float switch, and plumbing to ensure all parts are intact.
Step 2 – Place the Basin in the Selected Area
Mark the area where the sump pit will be installed.
Step 3 – Create the Sump Pit
Dig a pit at least 2-3 inches wider and deeper than the basin. Add 2–3 inches of gravel at the bottom.
Step 4 – Install the Pre-Plumbed Basin
Place the basin into the pit and make sure it is level. Backfill around it with gravel.
Step 5 – Connect the Discharge Pipe
Attach the discharge pipe to the check valve. Ensure the water drains at least 10 feet away from your home’s foundation.
Step 6 – Seal and Secure the Basin
Use sealant to close any openings around the lid and pipe to keep insects, moisture, and radon gas from escaping.
Step 7 – Connect to Power Source
Plug the pump into a GFCI outlet. Avoid using extension cords.
Step 8 – Test the System
Pour water into the basin to activate the float switch. Make sure the pump runs smoothly and drains the water.
Common Installation Mistakes to Avoid
Wrong Discharge Location
Never discharge water toward your foundation or a neighbor’s yard.
Not Sealing the Basin Properly
A poorly sealed basin causes odors, mold, and radon gas to escape.
Using the Wrong Power Source
Always use a grounded GFCI outlet for safety.
Maintenance Tips for Long-Lasting Performance
Monthly Inspection Checks
Check the float switch, pump operation, and discharge line for blockages.
Cleaning the Pump and Basin
Remove debris and sediment every 3–4 months.
Testing During Rainy Seasons
Perform a test at least a week before rainy seasons to ensure the system is ready.
Signs Your Sump Pump Needs Replacement
Odd Noises or Vibrations
Grinding or rattling noises signal wear and tear.
Frequent Cycling
If the pump turns on and off repeatedly, the float or check valve may be malfunctioning.
Visible Rust or Wear
Rust can damage internal components and reduce efficiency.
Cost of Installing a 3/10 HP Pre-Plumbed Sump Pump
DIY Cost Breakdown
| Item | Cost |
|---|---|
| Pump System | $150–$350 |
| Tools & Supplies | $50–$120 |
Professional Installation Cost
Professional installation ranges from $400–$850, depending on labor and complexity.
Conclusion
A 3/10 HP pre-plumbed sump pump system is one of the easiest ways to safeguard your home from basement water damage. With most plumbing already done, installation becomes simpler, faster, and ideal for DIY homeowners. If you follow this guide step-by-step, you’ll have a reliable system that protects your home for years to come.
FAQs
Q1: How long does a 3/10 HP sump pump last?
Generally 7–10 years with proper care.
Q2: Can I install it without digging a pit?
No, a pit is required for the system to work effectively.
Q3: Should I install a battery backup?
Yes, it helps during power outages or storms.
Q4: Can this system be used outdoors?
It’s designed for indoor use only.
Q5: How often should I test the pump?
Every 1–2 months and before rainy seasons.